5/22/13

A Simply Sweet "Baby Girl" Baby Shower

This last weekend, I helped throw my beautiful friend Rachel a baby shower.  Rachel had requested a laid back co-ed shower at the park where family and friends could relax and play some games.  Of'course, we still had to highlight that sweet little girl growing inside her, so we went with a simple "baby girl" theme and tried to not get too stuffy with the decorations.

I think it turned out beautifully.  We were blessed with gorgeous weather and some good food, thanks to the mom to be's grandpa (can you say carne asada?).  And I think our decorations were just enough to make it feel like a baby shower without making the men uncomfortable.

These napkins were picked out by the grandma-to-be and became my inspiration for the decor.

I made a simple burlap "baby" banner for the unnamed baby girl as well as some cute fabric flag bunting to hang across the gazebo.


I also strung up some onesies and outfits for the baby girl over the cupcake table.


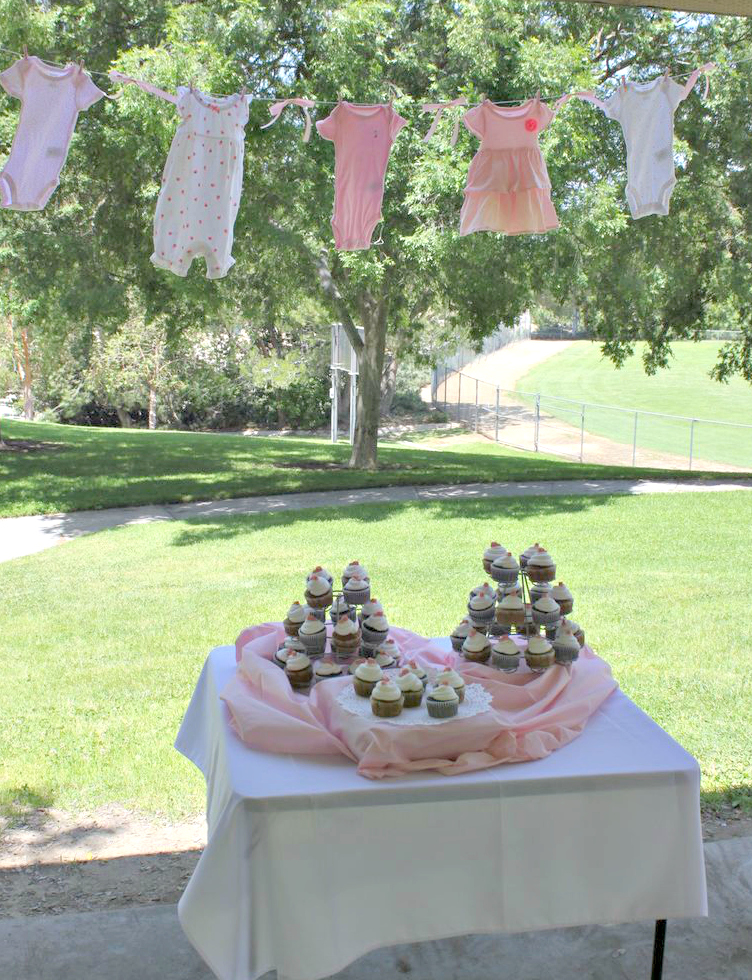
Little pink bows went in between the onesies.

The cupcakes were made by one of the hosts' mother and were adorned with pick chocolate booties.

My good friend Kerri (who you can find over at The Creative Side) was in charge of the centerpieces and decorated the picnic tables with Mason jars wrapped in burlap and twine.  Little plastic pacifiers finsihed off the look.  I thin kthey turned out so cute!


For the pink table runners, we had the great idea of buying cheep plastic table cloths from the dollar store and cutting them in half to make a simple runner.  It was so much easier that my first idea which was to sew table runners from fabric!


Finally I decorated a basket for the baby's library since we had asked guests to bring a book in place of a card.


Here is a shot of the beautiful couple.  They are sporting the pacifier necklaces that Kerri made for the shower game.  You know, the one where you can't say certain words, or your necklace get's stolen?  The guys and kids loved the game.


And here are the beautiful ladeis that made this shower come together.


And me and the beautiful mom to be.  You can't even tell she's 8 months pregnant!


5/20/13

Master Bathroom Update: Sneak peak at finished tile

It's so difficult to take pictures of Jeff's work because when he finishes one step, he immediately moves on to the next, which means covering up what he's done.  I was able to snap a few quick pictures of the tiled shower before Jeff covered it in plastic to texture and paint the bathroom walls.  The tiling was quite the challenge with such small tile and lots of cuts, but I think it turned out great, and hopefully, Jeff feels it was worth all his hard work.


5/18/13

23 weeks and 23 months

This week I became 23 weeks pregnant and Wesley became 23 months old!  That means I'm gonna have a 2 year old in one month and in 17 weeks, I'll have two kids!  Wow, what a life.


Wesley is the cutest, smartest almost two year old I know ;)  His favorite things to say lately are "I'm poop," "Look at me," and "I do it."  He's an attention seeking, independent, boy!   Wesley is also singing several new songs lately which just melts my heart.  


At 23 weeks pregnant, I'm still feeling pretty good.  The other day, my feet swelled up like balloons and I thought i was in big trouble, but apparently the 90 degree weather played a part in that.  They've gone back to normal!


5/14/13

Bathroom Project part 4: Drywall, lighting, and tile!

Our new Master bathroom is moving along!  Jeff started tiling last week, which is really exciting!!!  This week he plans to start and finish tiling the shower and then its all finishing touches after that!

Below is a picture of the shower, but notice the drywall on the ceiling with two recessed lights he installed for the shower.   


This next picture shows the electrical for the light fixture we'll install over the vanity.
(note, this is a small bathroom, but the angle of these pictures make it look even smaller!)


In this picture, you can see the fan and a cabinet Jeff installed in the wall between the studs. We found the cabinet at Ikea in the "as in" department.  It was the perfect size for our in-wall storge solution.


And tile!!!  Tile is the most exciting step for me.  Its when the bathroom really starts to take shape.  Jeff laid the floor tile last week.  They are 12 x 24 in dark gray tiles from Lowes. 


More about our Bathroom Here, Here, and Here

5/13/13

22 weeks and a Happy Mother's Day!

I'm late with this post due to a busy busy fun weekend.  Happy belated Mother's Day to all you women out there who are, will be, or want to be mothers!  I am so blessed by my own mother, grandmothers, and mother-in-law.  I dont think I could do life without them!  I am also feeling very blessed to be a mother to our sweet Wesley and to be growing a new life inside me.

I hit the 5 month mark this past week!  4 short months to go.  


5/9/13

What Jeff made for dinner

I was suppose to make dinner tonight.  I was dilly dallying because I really don't like to cook and don't think I cook very well.  Well my super duper Jeff came to the rescue and said he would cook.  He whipped this beautiful meal up in 20 minutes.  One of the many reasons why I love this man.


5/8/13

A boy and his dog

Don't they just look like best buds?!  Wesley love love loves Nukie and talks about him all the time.  When ever we're out and about and say, "Time to go home."  Wesley promptly responds with, "See Nukie?"  Wesley loves his dog.  And Nukie, well...Nukie pretty much hates Wesley.

Wes at 22 months with Nukie
Ok, that was harsh, I think Nukie has more of a love-hate or hate-love relationship with Wesley.  Nukie has been jealous since day one and two years later is still incredibly jealous of the attention Wesley gets.  He growls whenever Wesley comes close to him or when Wesley is running around the living room and Nukie is trying to sleep.  But I see that he does love him as well.   Nukie is generally a protector and its no different with Wesley.  He runs to him when he cries and takes his naps in the same room as Wesley.  Nukie also knows that Wesley will give him his food and they are way to in cahoots in that regard. 

Wesley testing how close he can get
Nukie has also never snapped at or really even barked at Wesley.  Even now when Wesley hits him in the face or grabs his tail, Nukie will give a mean growl, but never more.  We call him an old man because he just seems so grumpy around Wesley.  But like many old men, there is a soft heart underneath all that roughness.

Wes at 11 months with Nukie
Nukie is seriously a crazy dog and at times I want to get rid of him.  Don't judge me! You might too after the 6th set of window blinds he's ruined.  Or after the 3rd window screen he's ripped up trying to get in the house. But then I see my little Wesley light up when he sees his doggy and I know I'm stuck with this dang dog forever.

Dad making sure Nukie doesn't eat Wesley


5/7/13

DIY mother's day gift from your baby/toddler

I posted this finger painted pillow last year, but wanted to share again as you prepare for mother's day.  If you have a sewing machine, you can pull this one off pretty easily.  I know my moms love handmade gifts over anything store bought, and this is one your baby or toddler can help you with. 

Last years post:

I wanted to show you the gift I made for my mother and mother in law for mother's day.  I wanted to do something that involved Wesley and this idea just came to me a few nights before the big day.  I think it turned out great {I'm actually pretty proud of myself}. It was relatively simple and I think it makes a great handmade gift for grandparents at any occasion.


A few notes about the supplies:
For my fabric, I used an old white sheet.
It is almost necessary to have a helper (other than your artist)  

I just taped regular computer paper to our dining room table. If I were to do it again, I might use glossy photo paper because when I transferred the paint to the fabric, some of the paper came with it. It eventually came off but to avoid that issue another type of paper would work better.  Or if you had some plexi-glass or other type of material hanging around, that would probably work to.


I don't have a good picture of this step (I was washin the baby), but this is really the key for getting the look I got on my fabric.  I don't think you can really mess this step up, but don't try to finger paint directly on the fabric.  I mean, I guess you could, but I don't recommend it.  I think you get a cooler, more abstract result by transferring the image. 


Here is a good pillow tutorial for you: Click Me.  I am no expert sewer.

And tada! You are done. It was a total hit with the grandmas.  I actually wish I had made a few more for myself.

5/6/13

Master Bathroom Part 3: plumbing and shower prep

The master bathroom is moving along quite quickly these days.  Jeff finished the plumbing a few weekends back and moved right along to installing the shower base and cement board.  He is actually a bit further ahead then the pictures show and has finished the electrical and drywall as well.  Hopefully, we'll take some pictures soon.

Here are some pictures of the plumbing.  The plumbing was the most difficult task for Jeff and the one most unfamiliar to him.  He studied YouTube videos and plumbing books and had a little experience with his work.  He ended up getting some help from some friends who fit easier in our small crawl space, but he walked them through the process.  We are both pretty proud that Jeff was able to complete the plumbing without hiring outside help.  He is one handy guy.


Below is the plumbing for the shower fixture.


Below you can see the hot and cold pipes to the right where the vanity will sit.  On the left, you can see the toilet flange where the toilet will sit.  It will be a pretty tight space.


This is a rear view of the same area.

The next few pictures show the shower base by TileRedi that Jeff installed as well as the niche and cement board for the shower.  The TileRedi base allows us to tile the base of the shower without having to build the base from scratch.  Our shower will be 54x30 inches and takes up the whole wall where you see the window.


Here is the niche that will be in the short wall opposite the fixtures. 


A view of the shower base from the outside.  You install it by setting it in a layer of concrete.


Cement board up:


To see more of the bathroom project: