Showing posts with label what jeff built. Show all posts

9/29/12

Desk to Nightstands with Concrete Tops


I mentioned earlier this week about the nightstands Jeff made for our bedroom update.  He got a free desk from goodwill because it was in such poor condition, that even they wouldn't sell it!  I had been looking for a desk to make into nightstands ever since I saw this post by Sugar Bee Crafts last year. 

{source}
 The one Jeff found was perfect. Of course I don't have a good before picture because Jeff was too eager to rip the old desk apart and start on the project, but I managed to have him snap a few before he made too many changes. The desk had a lot of water damage, so Jeff ended up replacing the sides of the drawers with 1/8 inch plywood.  After, he basically rebuilt the shell, he sanded and painted them white and gray.
The top of the desk was so water damaged that it also could not be used, so we thought of different options for the tops.  More plywood, marble, laminate....and then Jeff had the brilliant idea of making his own concrete tops!  He built a "mold" using a piece of plywood as the base and then left over pieces of 1x2s that he clamped together.  He realized after a couple of cracked tops, that the best concrete to use is actually mortar.  It dries incredibly fast and left no bubbles on the top.
To seal the concrete he used this stuff.

Then he adhered the tops to the base using construction grade adhesive.
 
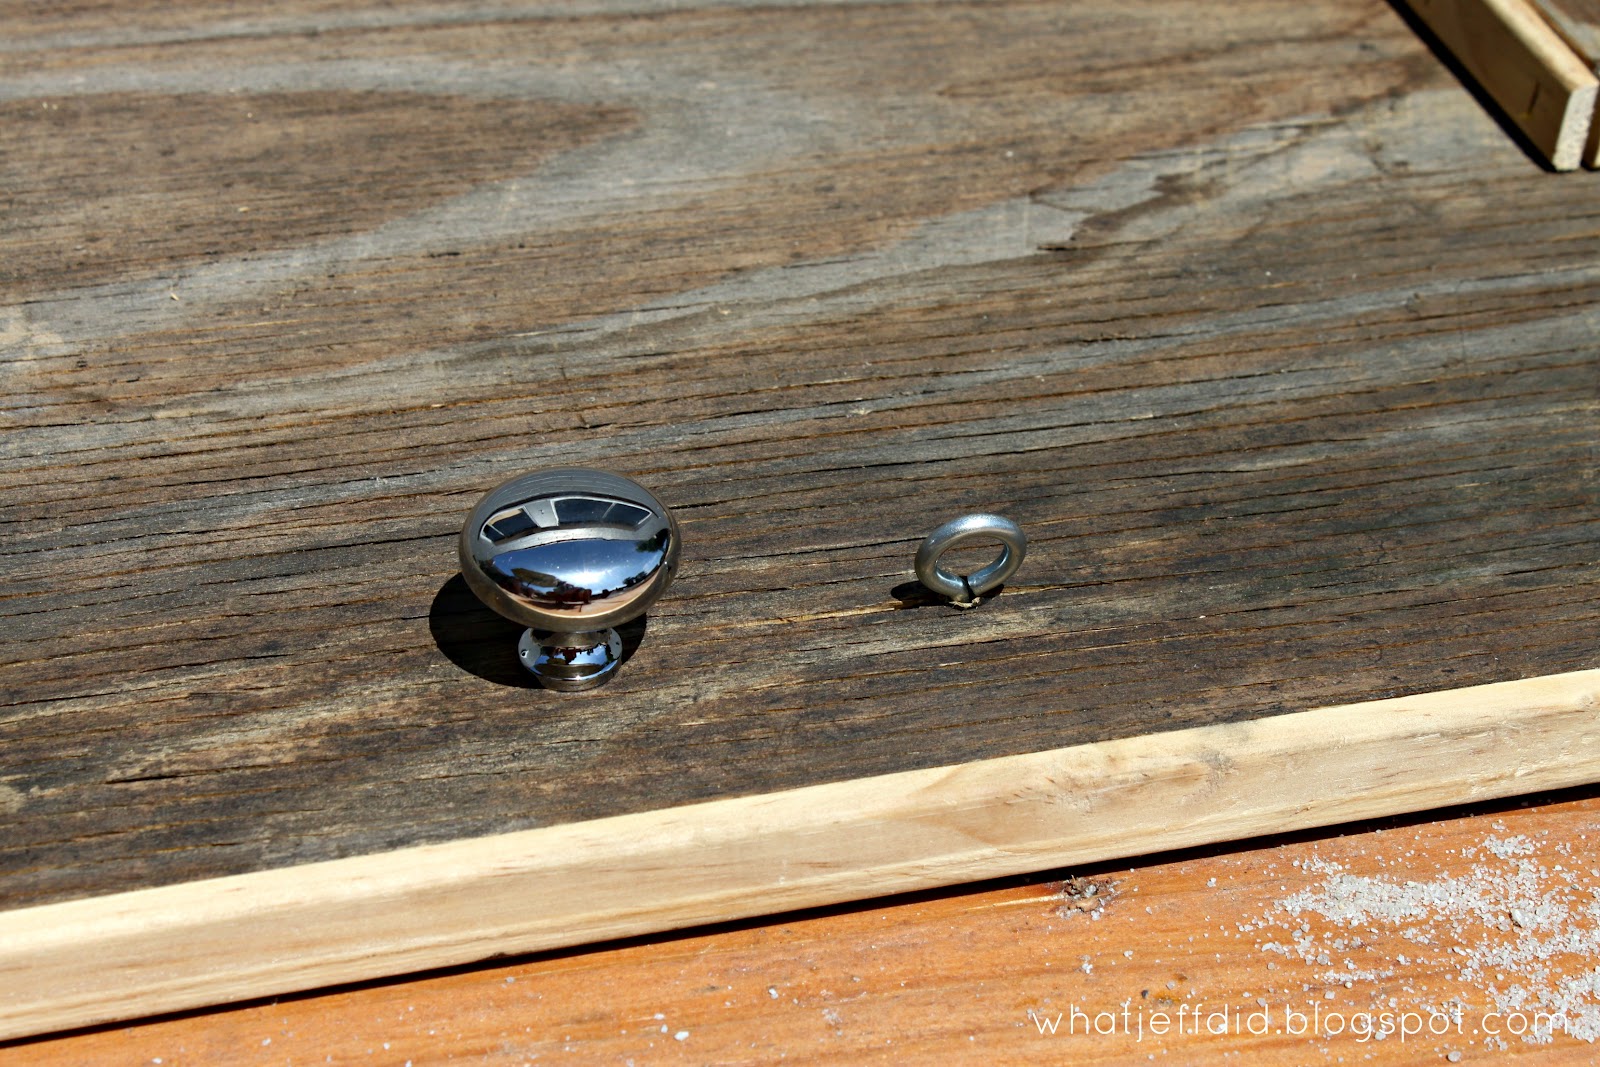
We chose these glass knobs from Home Depot to finish them off.
And here they are in our bedroom.  Its starting to come together!
(bonus sneak peak of our new headboard!)
 

6/19/12

A Chalkboard Sandbox Cover

We are back to project posts!  Yay!
Here is the finished sandbox that Jeff built for Wesley using only extra materials that he had lying around the garage.  


He created the sandbox by framing out the side of the deck that he left unfinished with plywood and then trimming the sections out with leftover 2x6s.  See more about how he built the deck HEREHERE, and HERE. We filled the sandbox section with about 20 bags of sandbox sand from home depot.

 It took him forever to decide on what to do with the cover because the only piece of wood big enough had a big whole in it.  You can see the whole in the picture below.  


He decided to just use it instead of buying something new and used another piece of plywood to "patch" up the hole.   Then he added trim pieces he had left over from another project and the "W" he recently cut out on the scroll saw to give the awkward square a little purpose. 


He also added the trim to the front part pf the cover to make it look a bit nicer and more kid-friendly.


He found a little nob to use as the handle.  He put a latch on the wall behind the sandbox, which hooks into the little eye-hook you see next to the nob.


He also happened to have a few hinges on hand. 


After the cover was opened, I knew we needed to do something to the underside of it because it looked pretty ugly.  I've been a little obsessed with chalkboard paint lately so naturally it was my first choice.  And, you guessed it, we happened to have some on hand.  


I love that the chalkboard paint made the hole a little less noticeable and gives Wesley another outdoor activity.  The kids at Wesley's birthday party loved it. And Wesley loves it to.  He's a natural at smashing sand-castles.


5/18/12

DIY Headboard from Table Top


This is another project that Jeff tackled a while back.  He turned a no longer needed table into this great looking headboard for no money at all!  The dining table was a gift from his parents for his 21st birthday and it had been well used over the last 10 years.  Oddly enough, I don't have a picture of it, but this picture is of a similar table.  Ours is just a bit bigger (it sat 6) and was not painted white.  
Coaster Damen Rectangular Dining Table in Warm Natural and White Wood
i lost the source for this picture!

Jeff created the headboard by first removing the legs of the table (which required just unscrewing them from the tap top). 
He then sanded the table to remove the glossy layer.  
Next he stained the table with a dark brown stain.  Because the table was made with laminate wood, the stain did not take like it normally does, which at first was a disappointment, but then we decided we liked the unique look of it.  


Next, for a little flair, Jeff used a nail set to create an A (our last name starts with an A).  He found a font he liked on the computer, printed it out, taped it to the table/headboard, and hammered away.


To hang it on the wall, Jeff screwed a 2x2 into the studs on the wall.  Then he screwed the lip of the table (which you can see in the next picture) into the ledger board.  


I love the way it turned out.  It has this rustic modern feel to it because of the way the stain took to the table.


5/9/12

Looking back...at what Jeff built: Front Yard Fence

Jeff was making magic long before I started blogging, so I want to feature something he built back in the day (meaning over a year ago) every so often.  Today I'm sharing one of our first and proudest projects (ignore the grammar there): our front yard fence.  We designed and built it together from scratch and we are still so happy with the results. 
This is what the fence looked like before.  We have a nice big and flat front yard, so it just made sense to keep it fenced in. The original fence looks nice enough in this picture, but in reality sections of it were falling down and it was just really beat up.  Not to mention, it wasn't really our style. 
We wanted something different and modern and had seen a few homes in our old neighborhood that had horizontal fencing.  We decided to go with it, and this is the result.


 Although, Jeff did all the heavy lifting, he did enlist my help in assembling the fence slats.  And I became a pro with the nail gun. {A word about my work attire...I figure if I have to work in the hot sun, I might as well try to get a tan.  Anyone with me on that?} 

 Jeff designed the fence with a cap on top and then drilled little holes in it to put these solar powered lights in the fence.  They are the kind that you are suppose to stick in the ground.  Jeff just broke the stake portion off and stuck the little knob into the pre-drilled hole.  Its definitely MacGyvered (or should I just say MacJeffed? ...I'm laughing at my own bad joke right now), but its been holding up well over the last two years.