Showing posts with label jeffs doings. Show all posts

5/20/13

Master Bathroom Update: Sneak peak at finished tile

It's so difficult to take pictures of Jeff's work because when he finishes one step, he immediately moves on to the next, which means covering up what he's done.  I was able to snap a few quick pictures of the tiled shower before Jeff covered it in plastic to texture and paint the bathroom walls.  The tiling was quite the challenge with such small tile and lots of cuts, but I think it turned out great, and hopefully, Jeff feels it was worth all his hard work.


4/29/13

Master Bathroom part 2: demolition

Enjoy these blurry phone pictures of the demolition of the pre-existing master bedroom closet. 


9/29/12

Desk to Nightstands with Concrete Tops


I mentioned earlier this week about the nightstands Jeff made for our bedroom update.  He got a free desk from goodwill because it was in such poor condition, that even they wouldn't sell it!  I had been looking for a desk to make into nightstands ever since I saw this post by Sugar Bee Crafts last year. 

{source}
 The one Jeff found was perfect. Of course I don't have a good before picture because Jeff was too eager to rip the old desk apart and start on the project, but I managed to have him snap a few before he made too many changes. The desk had a lot of water damage, so Jeff ended up replacing the sides of the drawers with 1/8 inch plywood.  After, he basically rebuilt the shell, he sanded and painted them white and gray.
The top of the desk was so water damaged that it also could not be used, so we thought of different options for the tops.  More plywood, marble, laminate....and then Jeff had the brilliant idea of making his own concrete tops!  He built a "mold" using a piece of plywood as the base and then left over pieces of 1x2s that he clamped together.  He realized after a couple of cracked tops, that the best concrete to use is actually mortar.  It dries incredibly fast and left no bubbles on the top.
To seal the concrete he used this stuff.

Then he adhered the tops to the base using construction grade adhesive.
 
We chose these glass knobs from Home Depot to finish them off.
And here they are in our bedroom.  Its starting to come together!
(bonus sneak peak of our new headboard!)
 

6/27/12

A Little Bling for the Deck and How to Make the Perfect Tri-Tip

Meet Jeff's new girl...I mean grill.
But seriously, he is in love with his new grill.
He wont even use it though because he doesn't want to ruin the shiny newness.
Jeff got a great deal on this grill because it was the floor model. He has wanted a new grill for so long and he is in Heaven. 

To celebrate his new purchase, I want to share with you Jeff's recipe for the perfect tri-tip steak.  He makes a seriously good steak and if you've had it, you know. 


after you bring your trip-tip steak home....
1.pat it dry with paper towels
2. Create a spice rub
Jeff uses: Montreal Steak Seasoning with garlic and onion powder
3. Rub your rub on the steak
4. Throw it on a hot grill on high heat
5. Sear each side on high heat until the rub blackens
6. Turn heat to low
7. Cook until medium rare.  Don't be afraid of the pink!
8. Remove from grill to a cutting board
9. Let rest for 10 minutes
10. Slice (an electric knife helps!) and serve
11. Enjoy!


6/20/12

Our New Bar


Jeff may or may not have turned our backyard into the perfect party house with the installation of our new bar.  It may have been covered with soda bottles, but the party was raging.  He had this great idea that came out of no where and he pulled it off the weekend before Wesley's party.  I don't have a full tutorial for you, but basically...

He built a frame...attached it to the studs in the wall...added the top (a 2 x 8)...sanded and covered in spar urethane (repeated 3 times)...and added extra support using shelving brackets from Ikea.
Here's what it looked like for Wesley's party...and a sneak at some of the party decor. (Hope to post pics soon!) UPDATE: See pics HERE


Here's some pictures of the progression.


And just for fun, this picture of Wesley with the dirtiest face.  He is becoming such a little boy and is so dirty everyday from playing outside.  This day he was extra dirty, so i had to snap a pic :)


6/19/12

A Chalkboard Sandbox Cover

We are back to project posts!  Yay!
Here is the finished sandbox that Jeff built for Wesley using only extra materials that he had lying around the garage.  


He created the sandbox by framing out the side of the deck that he left unfinished with plywood and then trimming the sections out with leftover 2x6s.  See more about how he built the deck HEREHERE, and HERE. We filled the sandbox section with about 20 bags of sandbox sand from home depot.

 It took him forever to decide on what to do with the cover because the only piece of wood big enough had a big whole in it.  You can see the whole in the picture below.  


He decided to just use it instead of buying something new and used another piece of plywood to "patch" up the hole.   Then he added trim pieces he had left over from another project and the "W" he recently cut out on the scroll saw to give the awkward square a little purpose. 


He also added the trim to the front part pf the cover to make it look a bit nicer and more kid-friendly.


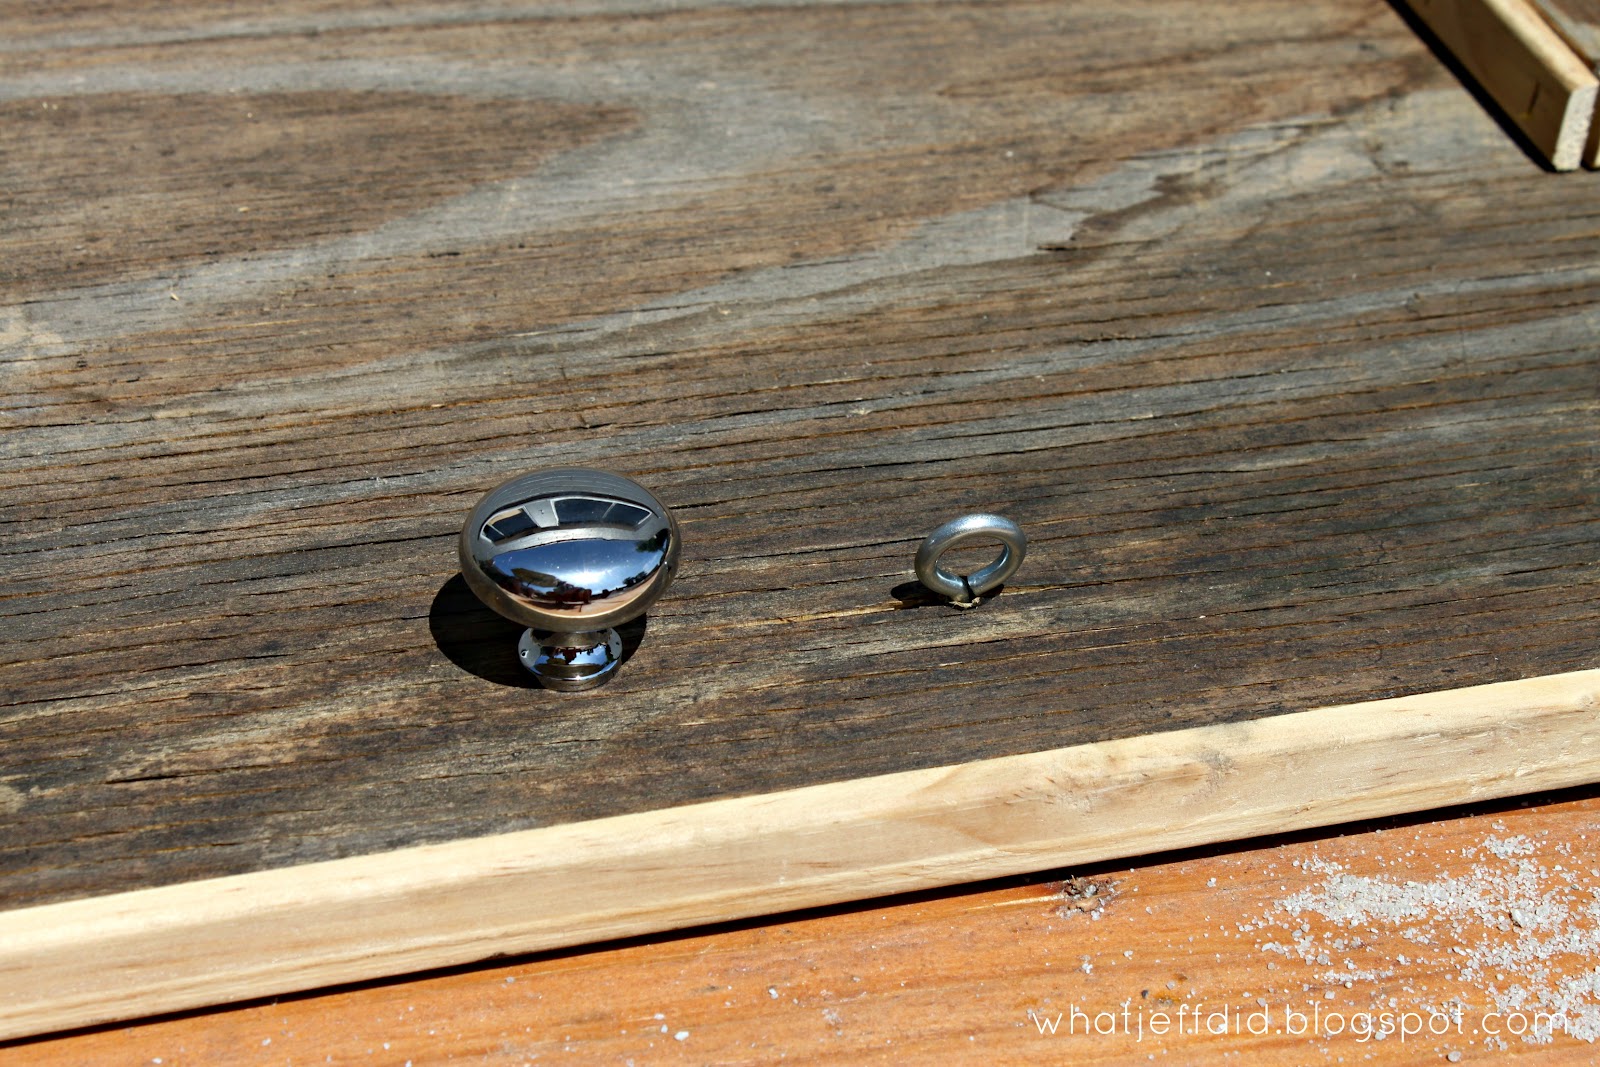
He found a little nob to use as the handle.  He put a latch on the wall behind the sandbox, which hooks into the little eye-hook you see next to the nob.


He also happened to have a few hinges on hand. 


After the cover was opened, I knew we needed to do something to the underside of it because it looked pretty ugly.  I've been a little obsessed with chalkboard paint lately so naturally it was my first choice.  And, you guessed it, we happened to have some on hand.  


I love that the chalkboard paint made the hole a little less noticeable and gives Wesley another outdoor activity.  The kids at Wesley's birthday party loved it. And Wesley loves it to.  He's a natural at smashing sand-castles.


6/12/12

BBQ Ranch Chicken Wrap

What Jeff made for dinner:
Yummy yummy in my tummy (ok, so we just started watching Yo Gabba Gabba and the party in my tummy song is constantly in my head!!! you other moms or dads get this?)!

Jeff turned some bland breaded chicken from the freezer section, into a yummy fresh dinner.

He mixed together the chicken, romaine lettuce, canned corn, avocado, crispy onions, ranch dressing, and BBQ sauce.  All wrapped up in a spinach tortilla.  It was pretty tasty.

5/30/12

A little scroll saw fun

This is the last thing Jeff did on the scroll saw. He was just messing around and trying to get use to the feel of it. He did this free hand, with out a template. Pretty good right?

W is for Wesley!


5/29/12

A little Sail Boat for Wesley

Jeff loves to fish and dreams of one day having his own boat.  So, when a co-worker was giving away an old little skiff, Jeff couldn't resist. It took him a while to come to the realization that this boat may not be sea worthy (at least not for him....actually still not sure he has given up the dream), so he decided to fix it up as a little Play-sail boat for Wes.   

This is what it looked like before.  We decided to leave the outside as is, you know, to give it a worn and rustic feel (or because we are lazy). But Jeff resinished the inside (sanded and painted) and gave the boat a new sail (made from two dowels; one big, one small, and an garage sale sheet). 


I think Wesley is going to have a ton of fun in it one day!

5/22/12

What Jeff Made for Dinner: BBQ Chicken & Avocado~Corn Salsa

Jeff got inspired by our warm weather today and grilled up some delicious barbecue chicken with an avocado~corn salsa.  It was finger lickin good!


Before he grilled the chicken breasts he covered it in this rub


And slathered it with this barbecue sauce.  This was my first time trying this sauce made from a local brewery in San Diego and I have to say, its gooooood stuff. You can buy it online here.


The chicken was good, super flavorful, juciy, and the bbq sauce...perfection.  But the real star of this dinner was the avocado~corn salsa.  Jeff got this easy recipe from our sister-in-law Jacqui last summer and it quickly became one of our favorites.  It goes with anything so Jeff always makes a ton! 


Here's what you need to make your own:

2 cans Black Beans, drained
2 cans Corn, drained
1/2 Large Red Onion, diced
4 Roma Tomatoes, diced
3 Hass Avocados, diced
Italian dressing to taste (Jeff used about 3/4 of a bottle)

Mix it all together and let sit for 10-15 mintues to let all the flavors combine. 

This recipe made a TON but it is so good for left overs.  Add it to quesadilas, burgers, with chips, whatever!


We ate dinner outside on the new deck on the new table.  We are so ready for Summer!